The free pattern, colour key and stitching instructions for the 2019 Reindeer
are available through the previous post. This post is for the finishing instructions
Reindeer Heart
Finishing Instructions
The red dotted line on the chart is backstitched using the cream thread.
I chose to match this thread to the fabric colour, so when the ornament edges are sewn together the edge will hardly be visible.
I chose to match this thread to the fabric colour, so when the ornament edges are sewn together the edge will hardly be visible.
If you wish this edge to be more visible, please feel free to use a coloured thread.
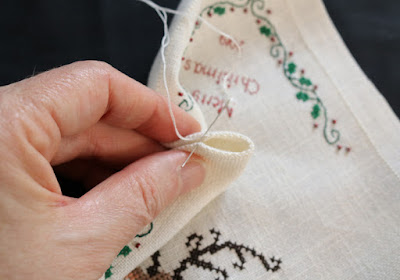
Fold the straight edge of the corners under and finger press
Then fold the sides under and finger press
Using the same thread used to backstitch the border (in my case, cream), sew the two edges together. Anchor your thread where the two sides meet, leaving the corner fold open.
Pair up the backstitches from opposite sides and slip under each
matching pair. Slip towards you with the first pair, and then slip under the next pair away form you. Continue alternating the direction of your slip stitches in this manner. Do not pierce fabric, only slip under the backstitches.
As you approach the bottom tip of the ornament,
fold under the other sides and continue.
Ensure fabric is tucked inside.
Once you have sewn up on the other side by about an inch, end your thread.
Make a slip knot
Hide your thread by stitching down into the ornament. Stitch down and out with your needle, pull on the thread a bit and cut. The tail will shrink into the interior.
In the same manner as you started on the one side of the ornament,
join the other two edges together on the opposite side of the ornament.
Do not completely seal this side. Leave a gap for stuffing the ornament.
Do not cut the sewing thread.
Using a safety pin pull a ribbon through the openings.
Then stuff the ornament until desired plumpness.
Finishing sewing edge closed. Then end your thread with a slip knot.
Hide your thread by stitching down into the ornament. Bring your needle
out, pull
on the thread a bit and cut. The tail will shrink into the
interior.
Pull the ribbon tight and tie a knot.
Leaving a desired ribbon length to hang your ornament,
tie another knot at the top. Trim excess ribbon.
Make a bow out of the remaining ribbon and sew it the base of the ribbon.
Voila !
Merry Christmas


